
If you haven’t started the Designing AI page yet, please visit that page by clicking here. Creating an AI is a straightforward process:
- Create Files
- Design/Create Behaviours
- Design/Create Decisions
- Design/Create Actions
During this process, you’ll have access to the AI Toolkit, designed to give you access to powerful tools and speed up your development.
Take a look at the image below:
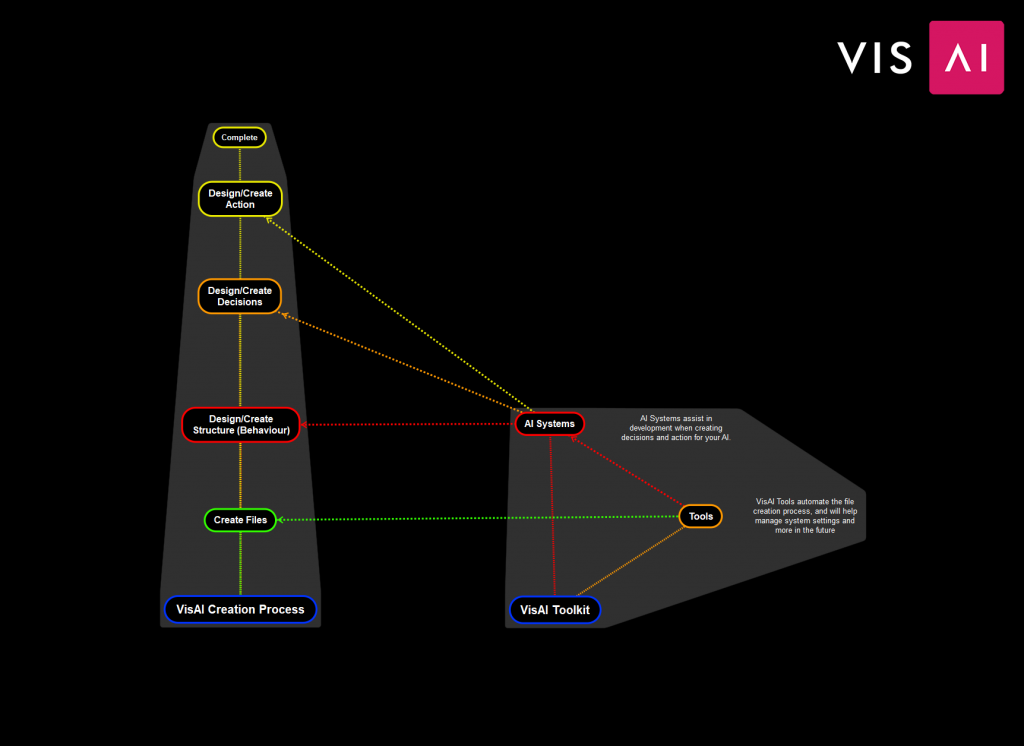
This shows an overview of the AI creation process in VisAI. As you can see, the Toolkit is designed to assist you in every step.
To learn more about what’s available to you, visit the AI Toolkit page here.
As an overview:
Behaviour is the design of your AI, it’s overall capability.
Decisions are the thought, allowing you to easily control how your AI makes decisions.
Actions are the instructions, or steps to achieve something.
Let’s move onto creating the files for your new AI.

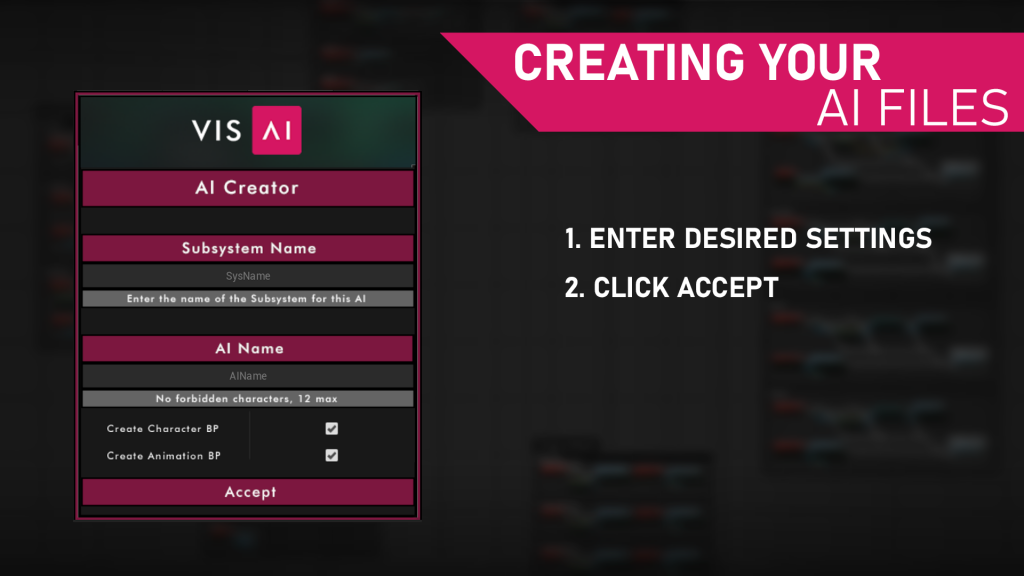
VisAI provides you an easy to use tool for creating AI files. The tool will create a new AI along with all the files necessary (Behaviour Tree, AI Controller, etc.) and assign the correct settings automatically.
Using the tool is easy. Just input the Subsystem you want to create an AI for, then enter an AI name. Optionally, you can have the tool create and assign a new Character and Animation blueprint for your AI.
Once you’ve entered your settings, go ahead and press the “Accept” button. Your new files will be found inside the Subsystem you entered.

Creating Behaviour from a design is easy, and can be completed in 2 steps:
- Register Behaviours/Goals/Plans with the AI’s Subsystem.
- Create the Behaviour Tree Structure.
That’s it, let’s get started!
B/G/P Registration
To register B/G/P’s, you can open the Enumeration files found in the Subsystem’s “Base/BPs/” directory.
Add each Behaviour, Goal, and Plan you have planned for your AI in the appropriate enumeration list.
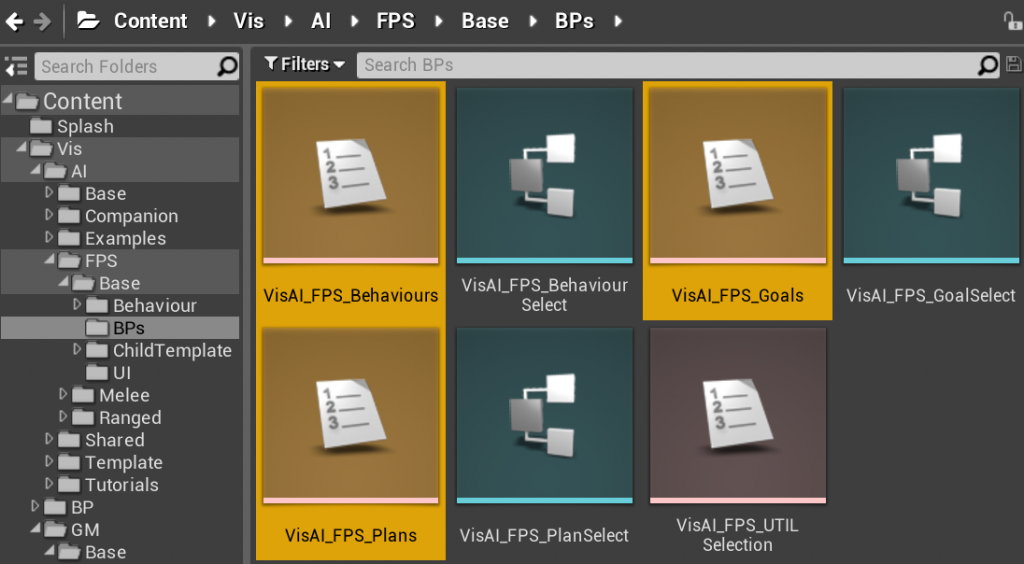
(Yours won’t be named this unless you’re working on an AI from the FPS.)
BT Structure
Next is creating the structure. Navigate to the folder your new AI is held in, and find the Behaviour Tree.
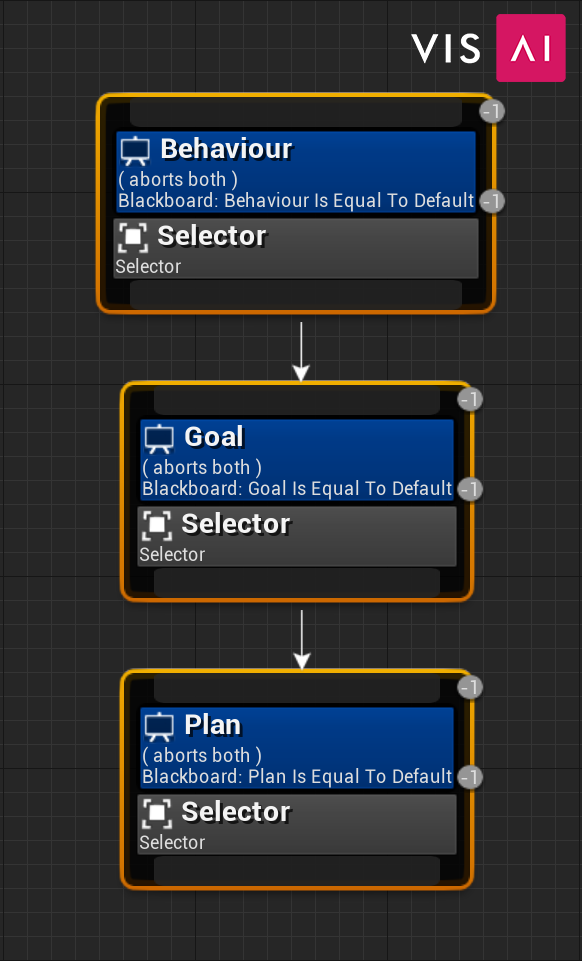
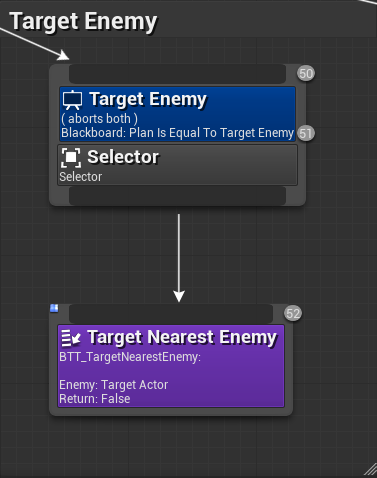
These are the 3 types of Selector nodes you’ll use to create your AI’s tree. You’ll see a few of them already aligned for you.
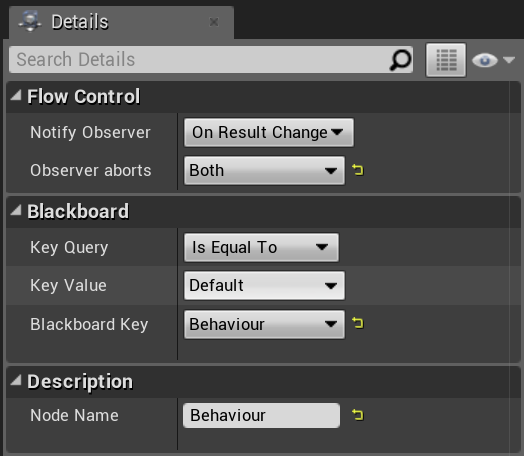
Simply recreate the design of your AI with the selector nodes shown above! You can change the values of each by clicking the blue part (decorator), and changing the settings in the details panel as shown below.
Once you’ve completed your tree, you’re done! Your AI now has a structure to work from, and you can begin creating decisions.

Creating Decisions is as easy as creating a decision function, and referencing it with your AI. Reference back to the Designing AI page if you need help designing your decisions.
Let’s get started!
Decision Function
Decision functions have a few pieces to them.
Score Input – The Score Input allows you to custom define a score for the decision. Most commonly, this is used as the score when the decision wants to score high.
Score Output – The Score Output is what will be processed by your AI to determine what Behaviour, Goal, and Plan should be running. The highest score of all B/G/P’s will be chosen.
- Navigate to the desired AI controller. You’ll also want to open up the parent AI controller for the subsystem, where you’ll find template decisions for a Behaviour, Goal, and Plan.
- Use the template to create your own decision in the Parent or Child AI Controller.
- (optional) Use the input to allow you to change what score is returned when the decision has high probability
- Provide the Score Output, which includes a score and the name of the B/G/P for the Decision.
- That’s it!
Remember you can change the score of a decision in runtime by checking outside factors, aka Influence as mentioned in the Designing AI page.
Decision Reference
When you’ve created all your decision functions, you’ll need to make sure your AI is using them by adding them to the “Retrieve Behaviour/Goal/Plan Decisions” function in your child AI controller. It’s as simple as making an array of all Behaviour, Goal, or Plan decisions, then providing it to the function return.
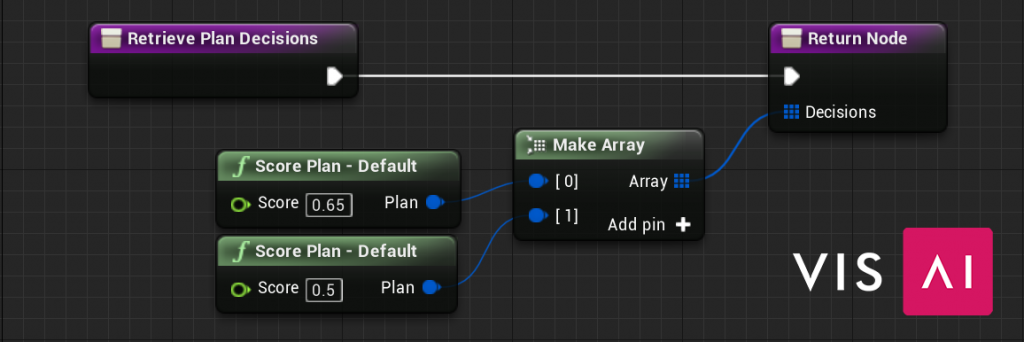
When you’re done, each “Retrieve” function will look similar to this, containing all the B/G/P decisions for your AI. Use the Score input to determine
Once you’ve placed your functions, make sure to assign a “Score” value to each of the decisions. Decisions that are higher priority should score higher
Now that you’ve created your decisions, the last step is to create the Action for your AI!

The last step of creating your AI is to create Actions for each of your Plans. If you need some help designing actions, take a look at the Designing Action page.
Let’s get started!
Creating Action
Creating a new action blueprint is incredibly simple.
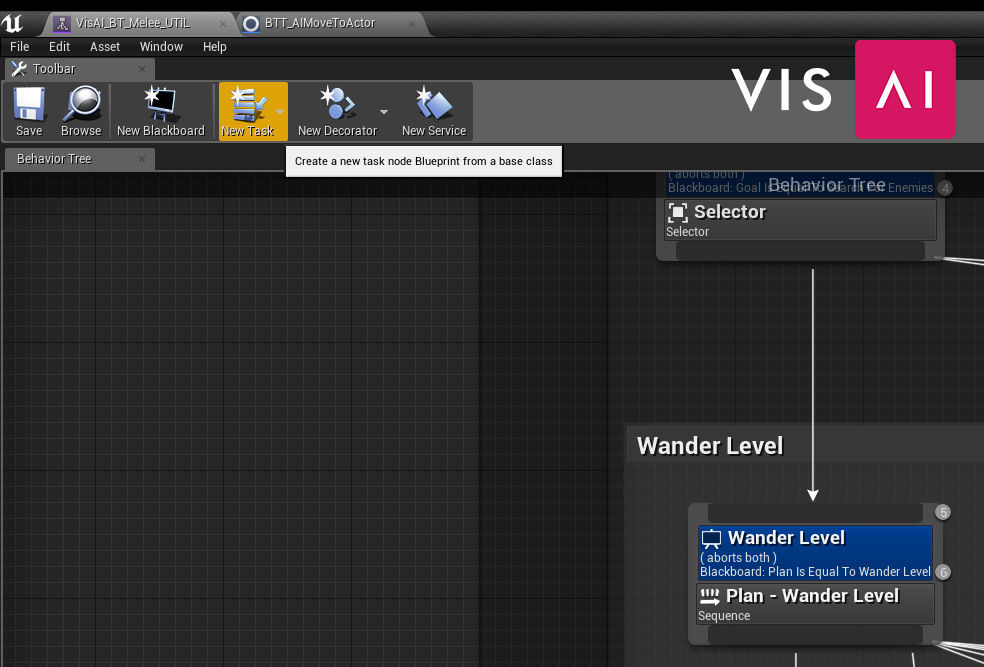
- Open the Behaviour Tree for the AI you’re creating an Action for, then select “New Task”
- Search for “BTT_Action_Base”, then select it by left clicking.
- Your new Action is created!
The next part you’ll need to do is create the actual logic for your Action. When a task is called on the Behaviour Tree, the event “Event Receive Execute AI” is called. Use this event by right clicking in the event graph, and searching for it.
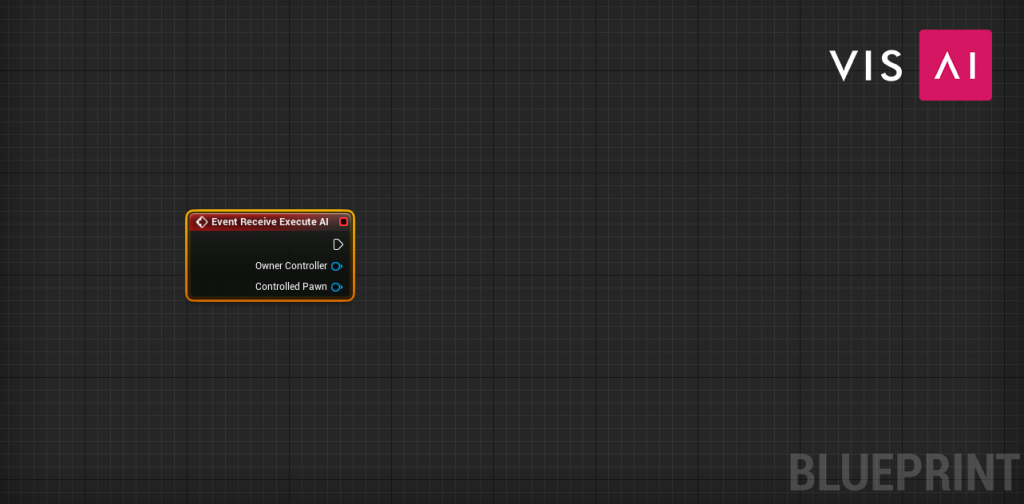
This is your starting point, everything within the Action depends on what you want to do with it. Remember that you have access to all AI systems, these are where they really help. If you’re confused on what to do, try taking a look at some of the examples provided with the pack, or checking out the Designing AI page here.
Using Action
Once you’ve created your Action, all you need to do to use it is place it in the Behaviour Tree. Simply right click anywhere in your tree, search and select your Action, then drag from the top of the node to the bottom of the Plan, linking them together as shown below
That’s it! Make sure to adjust the settings of the Action if necessary by left clicking on it and viewing the details panel.

That’s it for creating AI!
The key to creating AI with VisAI is having a solid design before starting. Be sure to check out the examples in the pack, and ask questions in the Discord if you’re having troubles! You should also take some time to look back through the documentation. Then, take a look at some of the AI Toolkit that’s available to you; or the available AI Subsystems that you can get.
If you have screenshots or something to share, all of us in the Discord community would love to see it!