
If you are new to Inheritance, you’ll need to familiarize yourself with it in order to modify or extend the framework. You’ll find a short video explaining inheritance here. You can also find a helpful article explaining it here.
Simply put, when a class “Inherits” from another class, it will become a Child and inherit the features of it’s new Parent class. This gives you a variety of bonuses, including decreased time spent developing, proper structure, reusability, modularity, and more. You’ve likely already seen examples of Inheritance in the engine without realizing it. Take a look at this graph over-viewing some of the Unreal Blueprint Class Hierarchy.
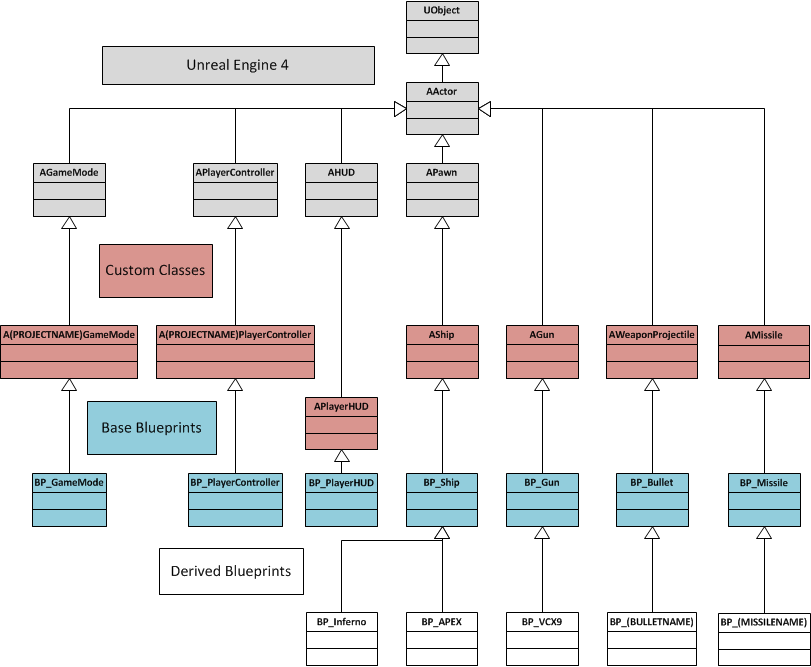
Figure 1. Blueprint Project Class Hierarchy. From “Games Prototyping – The Story So Far (Part 2)”, by B. Higgerson, 2014, https://brodyhiggerson.com/2014/08/04/games-prototyping-the-story-so-far-part-2/
As shown in the figure, you can see that the blueprint types listed are all children of AActor. In fact, all the shown blueprint types are also children of UObject because AActor‘s parent is UObject.
If you look at the blue and white boxes in the graph, you’ll start to see blueprints that would be created by you, the developer. Notice how this structure uses Parent Classes for features like ships, guns, and bullets. Using this structure allows you to create Parent blueprints with lots of functionality, and Child blueprints that change that functionality if necessary. Either way, you’re saving time and allowing yourself to create more with less.
VisAI uses Inheritance to provide you with child classes of the framework’s most important files, giving you the ability to override the framework to your needs, and differently for each subsystem in your project.

Overrides provide a way for a child classes to change how their parent class works. It allows you to replace, modify, or extend any function or event the parent has.
For example, you can change what your AI does when it sees a new enemy, change how it handles enemies all together, adjust how memory works, and more. Creating an override is easy, but the process depends on whether you’re overriding an event or function.
Events
To create an event override, go to your child class and search for the event on the event graph. Adding this event to your child has automatically created the Event Override.
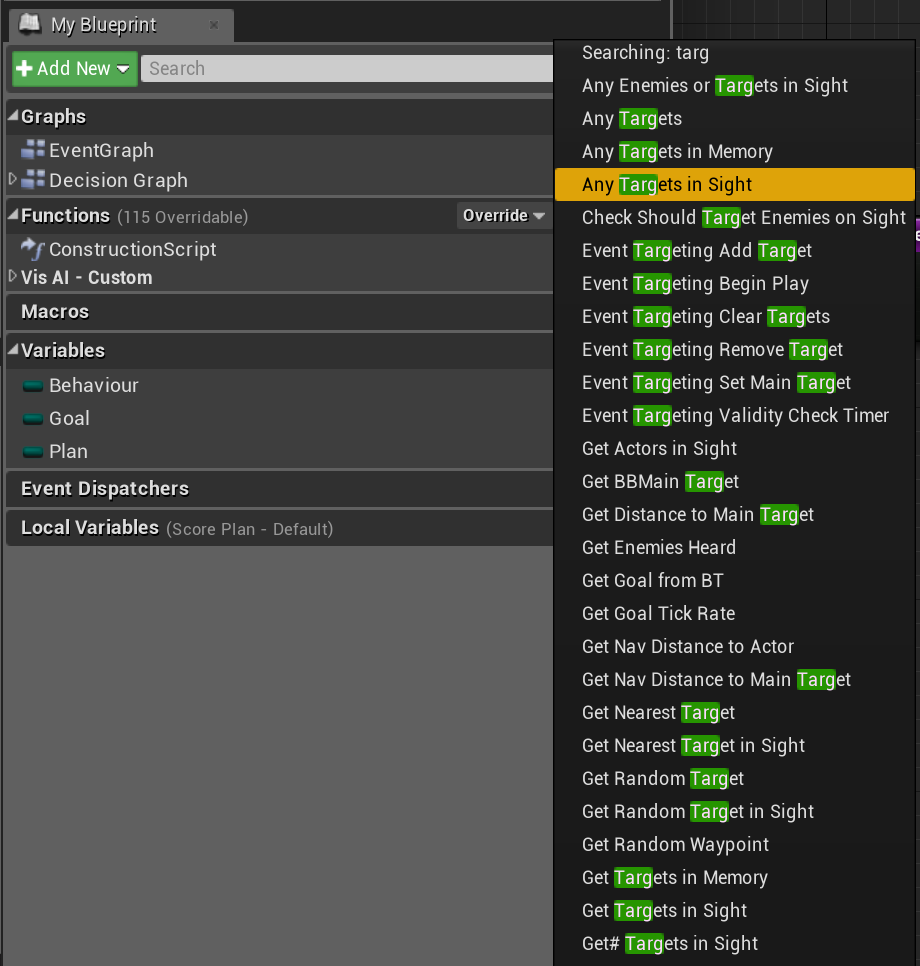
Functions
To create a function override, go to your child class and hover over the functions tab in “My Blueprint”. You’ll see a “Override” button. Find the function you’re looking for and select it; you can search by typing or by scrolling through the list. This will create a function override. You should now see the function in your blueprint.
Add Call to Parent
Adding a call to parent to an overridden function/event allows you to run the parent’s version of the function/event. This is useful when you don’t want to remove any of the existing functionality, but want to add to it. When creating a function override, you should see one placed automatically when you enter the function. If you created an event override, you’ll need to right click on the event, and select “Add Call to Parent”

That’s all for modifying the framework! If you want to learn a little more about what’s available to you, check out the AI Systems and Framework Class Hierarchy pages to get on the right track. Remember to send a message in the discord if you’re having any troubles 🙂