
The Command System provides your players to give AI replicated commands, and makes the process as quick as possible. There are two types of commands available with the Command System by default. Set Commands, and Selection Commands.
Set Commands simply send a command to the AI.
Selection Commands allow your players to “Select” actors, interactables, or something else for a command.
For example, Follow Nearby is a Set Command, while Order To Position and Interact are Select Commands.

First things first, you’ll need to create the Behaviour, Decision, and Action for your command. If you’ve used VisAI before, it’s the same. If not, and you want to understand what you’re doing before you do it, you can find a full overview by visiting this link.
Step 1: Creating Behaviour
Step 2: Creating Decision
Step 3: Creating Action

Once you have your Behaviour, Decision, and Action setup, you’ll need to reference your command with the Command System.
Step 1: Locate the VisBP_Interaction_Command_Enum file
Step 2: Add an entry to the enumeration list, give it the display name of your Command

Commandable
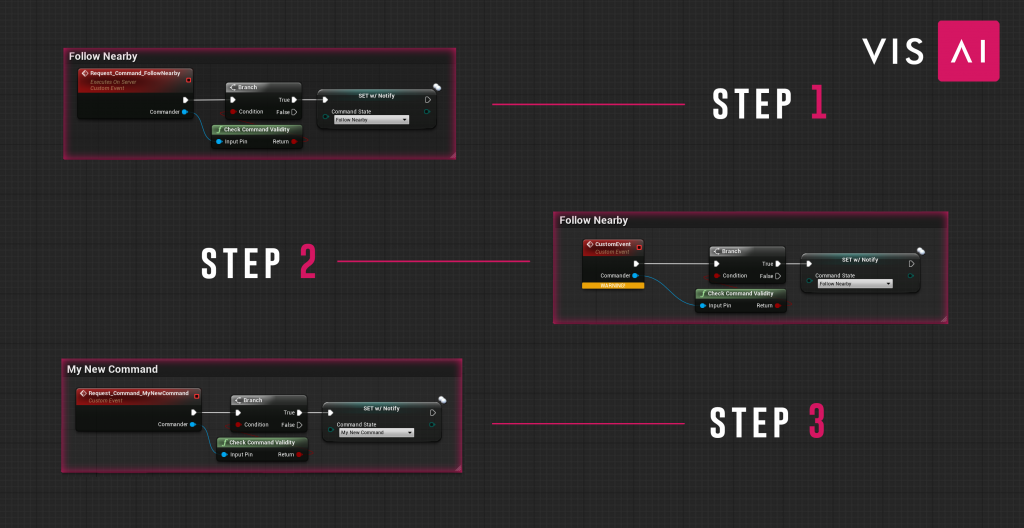
Step 1: Inside the Commandable_C, locate the Command Graph and find the Select Commands section. Copy and Rename the “Order To Position” command as shown below, you’ll need some of the nodes from it.
(If you need to pass any information for the command, you may do it in this event.)
Step 2: Set the value of the “Set w/ Notify” node for “Command State” to your new command’s name.
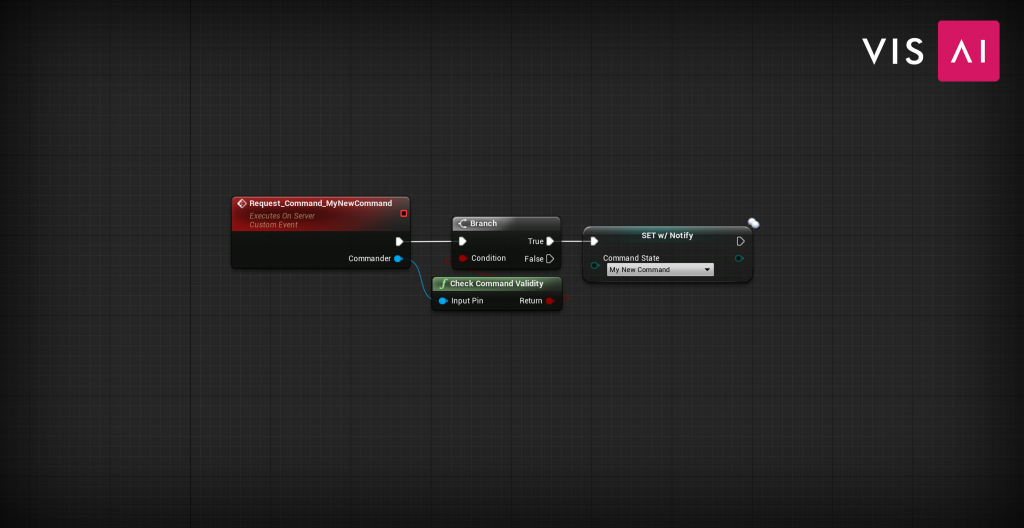
Step 3: Set your “Request” event to “Run on Server” & Reliable by selecting the event, and setting the “Replicates” variable. You can see the results below;
Commander
The Commander_C is responsible for providing any the data a command needs to the Commandable.
Selection Commands start by referencing the commandable that will receive the command. When a player releases the “Select” key on an object, such as a button or the floor, you can return information from that object for the AI to use in it’s command.
As an example, the Order To Position command uses a Trace For Location to provide the AI with a position to stand at.
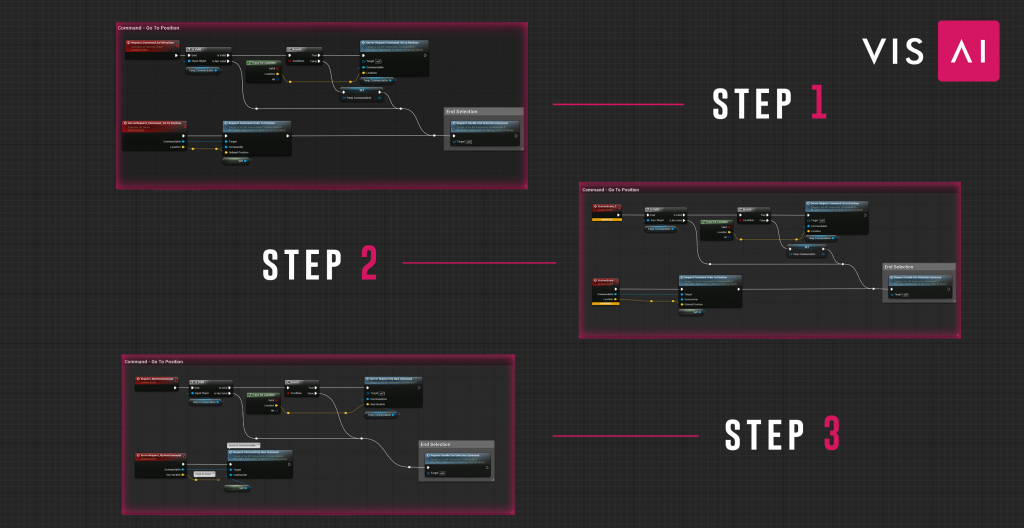
Step 1: Inside the Commander_C, locate the Command Graph and find the Select Commands section. Copy and Rename the “Go To Position” command as shown below.
Now that you’ve copied the command, let’s take a moment to ensure its properly replicated.
Step 2: Set your “Request” event to “Run on Owning Client” & Reliable by selecting the event, and setting the “Replicates” variable.
Step 3: Set your “Server” event to “Run on Server” & Reliable by selecting the event, and setting the “Replicates” variable.
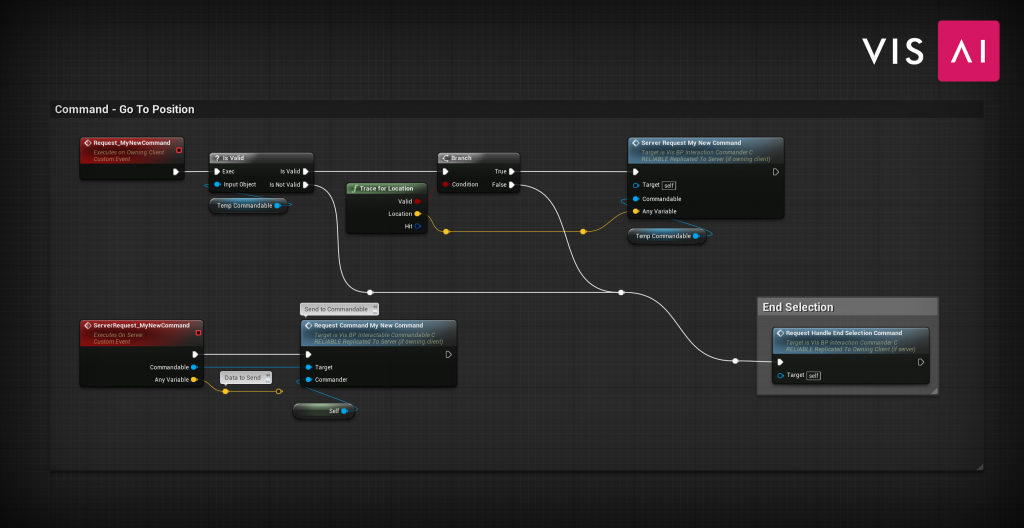
You can see the results below;
VisBP_FL_Command
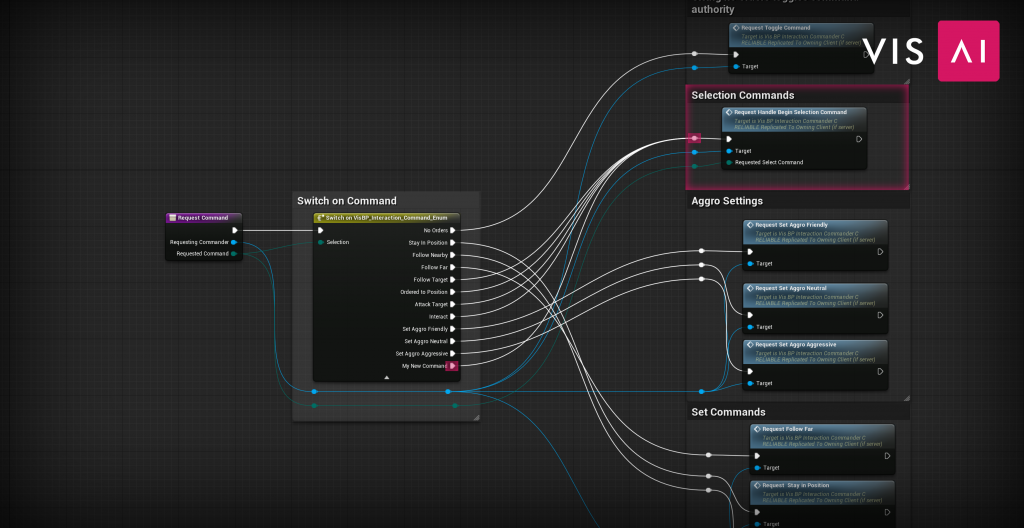
Step 1: Open the VisBP_FL_Command Blueprint. Find the “Request Command” function. On the “Switch on Command” node, you’ll see an unassigned execution line as shown below. From it, call the “Request Handle Begin Selection Command” function as shown below;
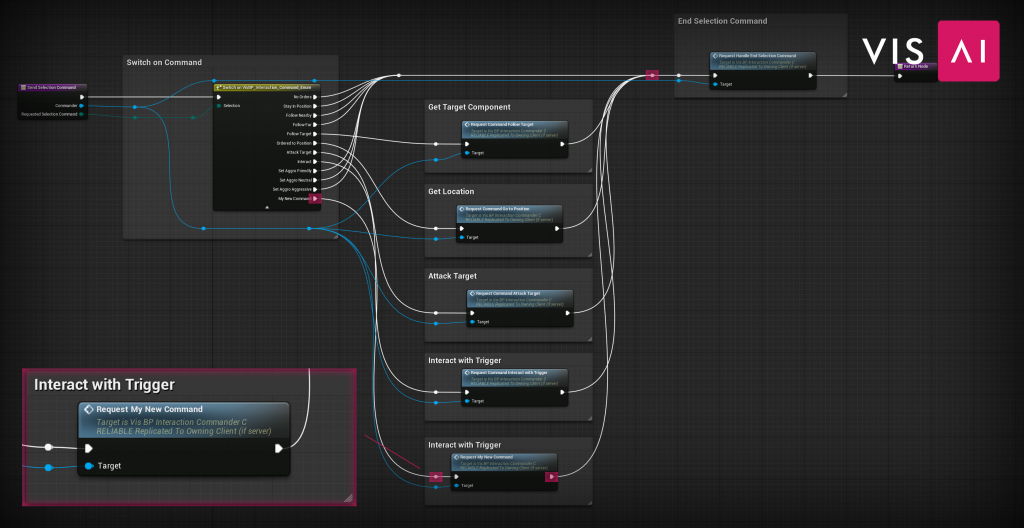
Step 2: Inside the VisBP_FL_Command Blueprint, find the “Send Selection Command” function. You’ll see an empty execution line for your command. Use the “Requesting Commander” function input to call your “Request” function as shown below;
That’s it! Now that you’ve finished your Set Command, continue on to Adding a Hotkey or Adding Command to The Command UI to start using your command.

Adding a hotkey for your command is incredibly simple! They work a little differently than Set Commands.
There are two inputs for your hotkey. The initial Command Request, and the Send Selection Command. The Command Request initiates the Command, setting the Commandable and preparing for the selection to be sent. The Send Selection Command will send the actual command request, giving the Commandable all the information it needs.
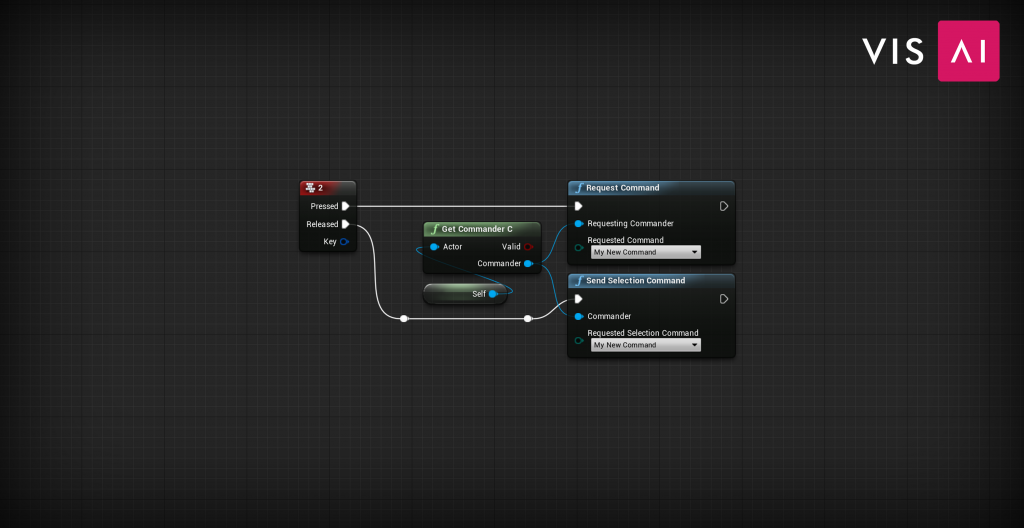
Open your Player Controller, and call the function “Get Commander C”. Use the Commander Reference to call the “Request Command” function, then the “Send Selection Command” as shown below;

The process of adding a command to the Command UI has been streamlined for you. First, open the VisBP_CommandBox_UI.
Step 1: Inside the VisBP_CommandBox_UI, open the Widget Graph and find the map variable “Commands” in the variables list under the Settings category.
This variable includes all the commands available to your AI. It can be changed at runtime, as done in the Widget Initialization Graph, in order to change the Commands your players can use. In the future, this will be datatable based to provide a quicker route for customization.
Step 2: Add your Command to the list; the order of the commands *does* matter.
(Note: Due to a bug in the engine, you’ll need to remove the command with “No Orders” before adding your command, and then re-add the “No Orders” command afterwards.)

That’s it for Selection Commands! If you haven’t learned about Set Commands yet, visit this page here to get started.